Monday, March 31, 2014

Baby Shower Bliss

In my previous post, I mentioned that the season of spring has sprung. Want to know what other season has sprung? Baby season! It seems like everyone we know has just had a baby, is about to have a baby, or has just found out that they are going to have a baby! Babies everywhere! 

I was honored to get to participate in planning a baby shower for my great friend Lindsey! Today I'm going to share the decoration I made. It looks like a piñata- and very well could be with a few simple modifications to the process! I was a little nervous to commit to making this because I wasn't sure how long it would take. But once I said it out loud and told the other girls what I was making, I had no choice but to carry on and hope it wasn't a major fail. 

There were a few piñata how-to's online that I got inspiration from. And for a brief moment I thought about making it a piñata... maybe full of airplane bottles for all of us guests who were not pregnant. But the thought of a flying bat, blindfolds, and pregnant women just didn't seem like a good idea! 

Here's what I did:

Step 1- Find big cardboard boxes that are in decent shape. I got mine at work and everyone was confused as to why I needed them. When I answered, "I'm making some baby shower decorations" they looked even more confused. 

Step 2- Search the entire town for baby pink crepe paper. Yeah, impossible. I gave up. 

Step 3- Settle for white crepe paper and buy 2 rolls of it... not 4. I always err on the side of having more rather than less. But now I have 3 1/2 rolls of crepe paper that I don't know what to do with. 

Step 4- Deconstruct your boxes carefully. 

Step 5- Trace the letter of choice onto a large piece of one of the boxes. My letter was an M. 

Step 6-Cut the M out. 


Step 7- Place the cut out M on top of another large piece of box and trace it. 

Step 8- Cut out the second M. 

**Note- if you'll be hanging this up, you may want to take this opportunity to poke some holes in the back and add a hanger of some sort. I poked two holes on each side of the back M and inserted a zip tie into each to make a loop. We hung the M on command hooks at the shower. Worked great!

Step 9- Cut 3-4" strips of cardboard that will act as the sides of the letter and will join each M together. 


Step 10- Tape away! I taped from the outside and the inside. I used masking tape, duct tape would probably be much stronger. 


Step 11- Keep taping!!! There is never too much tape! 


Step 12- Admire your creation and think about how beautiful it will look once it is covered up... because truthfully, it looks a little rough right now. 


Step 13- Cut a bazillion strips of crepe paper to cover every single part of the letter. You will take a piece, fold it in half lengthwise, and make multiple snips along it to create the frayed look. 

Step 14- Use Elmer's glue to glue each strip onto the letter, slightly overlapped so there are no spaces. Warning: this part takes forever!!! However long you think it is going to take... triple that. That's probably a more accurate guess. 


An the finished product (along with the beautiful mommy-to-be & company):


It was a beautiful and perfect day! 

Thursday, March 27, 2014

Spring Door Decor

Although the weather does not reflect the  new season, spring has sprung! The days are getting longer and the weather is, well, unpredictable to say the least. Hopefully it will become more consistent soon. Preferably consistently warm! 

In lieu of the new season, I decided to switch up my door decor. Thanks to one of my favorite websites- Jane.com- I got a great deal on this adorable bunny door hanger. It was only $12.99! The company that makes it (www.unfinishedwoodco.com) typically sells it for a little more but they were running a special through Jane.com. 


Isn't it cute?! As the name states, it arrives unfinished. This leaves the options wide open! I decided to use all supplies I had on hand. I didn't feel like buying anything special for it.

I taped off the monogram in the middle:


Next I spray painted it yellow:


Took off the tape:


Check out those crisp lines! ;) 


I decided to try and stain the monogram in the middle with my old stand-by, Restor-a-Finish:


Then I made a bow-type thing for the ear out of burlap:


There's something about it I'm not 100% satisfied with... is it the stain? I'm not sure. I'm going to have to leave it hanging for a few days before I can decide! I do think that the stained monogram will be difficult to see against our black door... I wasn't really thinking of that when I made it! Oops! I will update the post if I repaint. 

Thanks for reading! 


Saturday, February 8, 2014

Master Bedroom Woes

Does anyone else have this dilemma? I'm hoping it isn't just me... 

I spend so much time and put lots of thought into decorating our kitchen, dining room, living room, guest bathroom and bedroom, half bathroom.... basically every room but our master bedroom! And I know it's because that is the room that people are least likely to see when they come over. But at the same time, it's a room that we spend a lot of our time in! So why is it that I put less effort into decorating it? 

I am going to challenge myself to put more thought into our bedroom and give it more a more consistent color scheme. My biggest problem is making a decision on the wall color. It is currently a light tan (which is fine) but I'm thinking I would be more inspired if I found a new wall color and could take it from there. Here is one picture I found on Houzz.com (love this app and you should totally download it is you don't have it) that I am currently obsessed with:


Source: Martha O'Hara Interiors

What I love:
1. The wall color! So peaceful! 
2. The pattern on the curtains
3. The mixture of black chairs and dark brown wood furniture 
4. The nightstand setup 
5. The area rug 

The only problems are:
1. I don't think I'll ever be able to have white bedding due to the fact that we have two dogs. And life is too short not to let them lay on the bed every once in a while! And by every once in a while I mean every night :) our dogs are like our children. 
2. While beautiful, these curtains are not functional. They don't move or cover the windows at all. Upon further investigation I found out that this room was designed in a model home, so function was not as important as beauty. The designer said that if it were a real room for a client, she would add some bamboo shades. Being that our master bedroom is on the first floor, we need a little privacy! 

When I do find curtains that I love, they have to be 95". And I need FOUR of them. 95" curtains are not cheap. I like to find patterns I like at Target and then search for them on EBay. Here are the ones I currently love:


I would also like to find a huge area rug for under our bed.

Maybe I'll make that my mission today! Stay tuned as I add new posts updating you on the process of our master bedroom. I'll post a before picture at some point- but don't judge. 


Thursday, January 30, 2014

Snow Days in NC

I am starting to get a little cabin fever... I've been off work Tuesday, Wednesday, and Thursday thanks to the beautiful snow we got here in eastern NC! Tuesday was a bust... meteorologists were forecasting snow to start around midday and last through Wednesday morning- totaling 8-10"+!! So our schools closed on Tuesday to prepare for the "blizzard". 2:00 rolls around, no snow. 4:00 rolls around, still no snow. 6:00- no snow. 8:00- no snow. Around 9:00 we started to get some action... in the form of sleet! Still no snow! Most people wouldn't say they wished they had gone to work on a day that they were given off... but with talk of making up the day on a Saturday, I was a little frustrated. It seemed it had been cancelled for no reason. I totally understand why they did it, based on the forecast. 

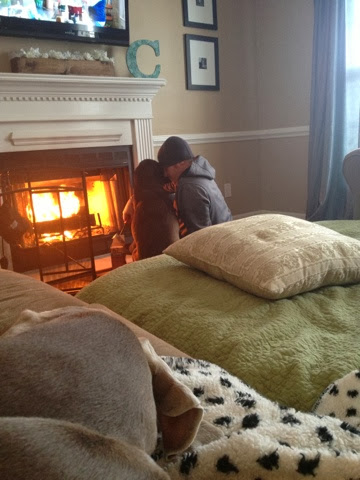
Anyway, I asked Ian to pull our mattress into the living room so we could sleep by the warm fire he had worked so hard to build! And it actually worked!! I am always trying to get him to camp out in the living room with me. It's so fun to do something different! We brought the mattress in from our room and set up our camp! 


It was so toasty!!! We were trying to decrease how hard our heating unit had to work during this storm... so we closed all the doors and kept the fire blazing so the living room would stay warm and the thermostat would register the higher temperature and therefore run less. At this point, it was still sleeting. No sign of snow. I felt like a kid on Christmas because I knew that when we woke up, there would be lots of snow (lots is used loosely here, lots in NC terms at least)! And I was right! 


It was nowhere near the 8-10"+ thanks to the hours of sleet we got versus snow. But it was so beautiful!!! 

We spent the morning with our puppies snuggled up in our warm house. 


That girl loves her daddy!

We ventured out in the afternoon for some snow time! 


The dogs had a hard time finding their tennis ball when it sunk into the snow... it left them a little confused!


We were bundled up!


Dixie LOVED her first big snow! Mostly she liked eating it!


And it is nearly impossible to get a picture of Benni when there is a tennis ball in sight. He is obsessed. 


In all of those pictures he is looking at the tennis ball, not the camera! 


When we came inside, the pups were a little tuckered out... 


5 minutes later...


They loved having the bed in the living room!


Spoiled rotten. 

We drank coffee, hot chocolate, and beer. We ate soup and grilled cheeses, chili, and made snow cream! 

I. Love. Snow. Cream. 

What I love more- chocolate snow cream! It tastes like a Frosty from Wendy's. I didn't take a picture of the snow cream because I was way too excited to eat it before it melted! 

To top off our last few days, our water heater has died. Just died. So if you can smell me right now, I apologize. Juusssttt kiddinggg. I got a shower before it died. I'll just have to wing it until tomorrow when we will hopefully have a new one installed! So excited that my in-laws are possibly coming tomorrow to help with the install! And soooo appreciative! I am also appreciative of ALL of our awesome friends who have offered up their own hot water to us! You guys are so sweet! Unfortunately for Ian and anyone else that has to see me- I am going to try and hold out! Simply to avoid the hassle of packing up my toiletries and trying to drive somewhere in this mess!

Ian headed back to work today, sadly. We basically got lucky with the way his schedule fell this week- that's the only reason we had the time together that we did! And I loved every second! But there are lives to save and surely enough there will be people attempting to go out on the roads that will need saving. I am going to attempt to be productive around the house today! 

I hope everyone is having a wonderful week!! 


Tuesday, January 28, 2014

Staircase Makeover Part 3

We're at it again! Back to work on the staircase... it's been driving us crazy living with it while it is under construction. I just don't like to look at it. So last weekend, we got re-motivated to push forward with this project. Last time we left off, I had stained the treads with two coats of stain. Well... in the meantime, we've been walking up and down the steps and it looked as though the stain was fading. So because of our procrastination, we created more work for ourselves! I decided I just couldn't go on with the project without adding one more coat of stain. So I did!

The next step was sealing the steps. After much debate, I decided on Minwax Polycrylic rather than polyurethane. Polycrylic isn't rated for floors, but after researching it I read that I may just have to re-seal them in a few years. That works for me! I've had bad experiences with polyurethane being sticky even after drying and I was not about to ruin all of our hard work!! So far, I've applied one coat. It needs two more! Here are some photos:

The top step in this photo has the polycrylic and the bottom step doesn't-


Same with this one-


So shiny! 

The next thing we tackled was the landing at the bottom of the steps. When we ripped the carpet up, we revealed a plywood base. It appeared that there were two layers so Ian attempted to cut the top layer off. We had to do this so that the flooring we added on the landing would be level with the lip of the landing that already existed. Here's what we found under plywood sheet #1:


Oh, what a lovely hole we found!!! So much for the plan to lay flooring over that layer. After much back and forth, we decided that laying flooring over the hole would not be sturdy enough. There was no support of any kind under the hole and walking near it made it sink down. We wanted to do this project right so Ian went to Lowe's and picked up a very thin sheet of new plywood and had it cut to size. We added that over the piece with the hole and nailed it down. It makes such a huge difference in the stability! 

Then, Ian began cutting and laying the flooring. This was flooring that was left at our house when we bought it and it matches the downstairs flooring. Here it is in progress:


Now it sits flush with the lip (which will also be stained- don't worry!) and makes for an even transition. 


Next steps:
-add two more coats of polycrylic to the treads
-add trim pieces on the landing

Here is the big question. What to do with those risers?! We originally were going to paint them white- and still may end up doing that. But a few other ideas floated around in my head as well. I've seen people add beadboard to them but I'm not sure that goes with the style of our house. The other idea I've tossed around is adding paintable wallpaper to the risers and painting it either white or black. The only worry I have with that option is the durability. 

Hmm... it will be a little while before I have to make that decision! I've got to keep this motivation up so I can add two more coats of sealant!!! Maybe being snowed in here in NC will help with that... NOT! I already want to eat junk food and drink hot chocolate all day long and I haven't even seen a snowflake yet!