Over the weekend, my friend Lindsey and I had planned to go to a few yard sales.I haven't gone yard-saleing (is that a word?) in a long time. I used to go with my Gram some, she goes all the time! There was a tropical storm threatening to ruin our plans with rain, but the bad weather was gone by Saturday! So off we went... Lindsey asked me if I was looking for anything in particular, I said no. She was looking for a mirror for her entryway and a chandelier for her dining room. I had just looked for a chandelier the day before and found one I liked a lot at the Habitat for Humanity Restore, but it was pricey so I left without it... more on that later.
We didn't really have a plan but I like doing things that way. I think I am a lot like my mother, but not in that way! If I were my mother I would have looked up all of the yard sale addresses, written them down, looked them up on a map, and then arranged them to find the most efficient route. She used to do that when we would go to Carowinds! Nope, not me!! We both had our iPhones, so we were good to go! They were all in the same general area (the same town at least) so we just bounced all around, sometimes (well, most times) not knowing where we were! And I loved it! Thankfully I don't get too car sick because we were making u-turns every other second, haha!
I didn't find much at the yard sales. But Lindsey found a sewing machine for $10! We were both so excited about that because she has been talking about wanting to learn to sew and I like when other people share my hobbies!! It makes it more fun! The only thing the sewing machine needs is a new foot pedal, which I found for about $20 online- so that is a total of $30!!! I looked up that same sewing machine online and it retails for $70. That's a savings of $40 people. Such a deal (as my Gram would say in her silly Gram way)! And to top that, the proceeds from that yard sale went to a girl in our community recently diagnosed with cancer. We also bought lemonade from the adorable little girls there :)
After the yard sales, we stopped at a place called Grifton Yard Sale. It is a big building open two days per week. I believe it is associated with a church. I always drive by on the way to one of my schools and have been wondering what exactly it was like on the inside... so we decided to find out! They had a variety of furniture, building supplies, windows, clothes, knick knacks (my favorite... NOT), etc. I didn't find anything I couldn't live without there either. Lindsey found a swivel store (I think that's what it's called... the as seen on TV thing that you put your spices in) for $1!! I assume it retails for $19.99 because that is the magic price for as seen on TV items!
After the Grifton Yard Sale, I decided to google antique stores in Grifton, NC and found one called "Some Like It Old". And off we went! We both love antique stores, too! This was a very cute store! And they just so happened to have a lot of sales going on. It is a store where there are multiple booths, each owned by a different vendor. So each booth had a different sale going on. I found an old nightstand that I thought I could fix up. It was only $20! I decided that even if it didn't turn out the way I envisioned, it was only $20! Well when the sweet lady at the register rang it up, I watched her cross out the $20 on the tag and write $10. Woohoo!!! Lindsey and I just looked at each other in disbelief! $10 sounded even better to me!
Next on our list was the Grifton flea market. We had never been there either but I had seen it on my way to and from work. On our way in, Lindsey saw a mirror that she liked and I asked if she wanted me to jump out and ask about it.. she didn't think it was big enough for the space in her entryway. So we carried on. We stopped by and walked around for a few minutes (it is not very large) to all of the booths that looked interesting. There was one man who was selling various pieces of furniture. I found ANOTHER nightstand that I liked! When I asked the price he said $10. I was in shock! I don't think I could get two deals that good in one day! I told him I wanted it for sure. So we went to get the truck when we were done (yes, we drove Lindsey's husband's truck in anticipation that we might load it up with stuff). The nice man loaded the nightstand up for us, although we are fully capable :) Here it is, in all its glory:
On our way back out of the flea market, with nightstand in tow, we passed that mirror again. Lindsey had a look on her face... one of those "I will probably wish I had gotten that if I leave here without it" looks. I know that look well! So we stopped and I jumped out to ask the man how much he was selling it for. He said, "15 but ask her (Lindsey, who was sitting in the truck) if that's too much". Well, sir... if you say THAT we are definitely going to offer lower... wouldn't anyone? So we asked if he would take $10 and he said yes. Woohoo!!! The magic price of the day! Here is the mirror:
She figured she could find somewhere to put it. And not long after we left, she thought of a perfect place! She plans to repaint it. I can't wait to see how it turns out!
Our NEXT stop was a place called The Venue. They repaint old furniture and home decor items and resell them. I like to go for inspiration, because I just so happen to enjoy painting/re-doing furniture. For those who don't, I totally understand why they would want to buy their pieces already done! We saw a lot of furniture we loved (but couldn't afford/shouldn't buy). And in the back of the store there is a warehouse of unfinished items that you can also buy. Back there, Lindsey found a chandelier! I couldn't believe she even saw it. I can't even describe how much furniture is back there. It is like a huge maze! Of amazing furniture that I would LOVE to own. Here it is:
We both wanted to find one that we could spray paint to update. The price tag on this one had a bunch of jumbled up numbers... but it appeared that it said $3 on the tag. So we asked the owner to come back and tell us how much it was. She looked at the tag and said it looked like it said either $3 or $13. So she sold it to Lindsey for $13! I mean... it was a little higher than the $10 we were accustomed to spending that day, but it would do! ;)
Next stop was LUNCH! We were starving... We ate at Noodles & Co. I had never eaten there, I recommend it! It was delicious. However, if a staff member tells you something is "not very spicy"... assume that it is. Or you will regret it.
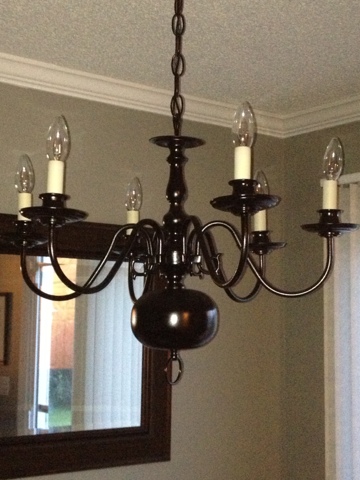
Next (we were not finished yet!!) we went to the Habitat for Humanity Restore. I couldn't stop thinking about that chandelier, the way Lindsey wouldn't have been able to stop thinking about that mirror if she didn't buy it! It was still there. The tag hanging down from it said $40. That was the price on most of them. That was the reason I didn't buy it the day before. I just kept thinking that price was WAY too high for an old brass chandelier. But I would have paid it if I had to... I really wanted it. We got a worker to get one down for me, but Lindsey noticed (once he got it down of course, oops!) that it was missing a piece. I asked him how irritated he would be if I wanted him to get a different one down instead. He said he wouldn't be, but I didn't believe him. He got the other one down and it was perfect! The most perfect thing about it was the price tag that was sticking to it (different than the tag hanging from it) which said $15! Now that's what I'm talking about! I may or may not have "lost" the hanging tag on the way up to the register... it turned out that all of the chandeliers had cheaper price tags stuck to them. I don't know what the deal was with the hanging tags. Here is my chandelier:

**I cannot take credit for the incredible floral sheet that it is sitting on. That would be Lindsey's. Give credit where credit is due ;)
Lindsey also found a lantern-type light for above her kitchen table. I am super excited to see how it turns out!
It is huge! It was a little more pricey at $30 and it is going to be a tedious process, but I think the end result will be totally gorgeous and worth it!
Last, but definitely not least... actually, this was probably the most important step... we stopped at Lowe's! We had to buy the spray paint we needed to transform all of our outdated finds!!!
Phew! It was a long day... we were non-stop from 6:30 am to 4:30 pm. Ten long, but fun, hours!
How often do you find a friend that you can shop with for 10 hours without getting bored/tired/irritable??? I'd say I'm lucky! Thanks for an awesome day Lindsey! :D