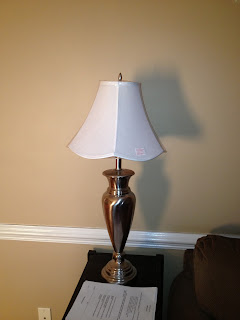
I went to Pinterest (which is a never-ending source of inspiration and the cause of my never-ending to-do list) and searched for "spray painting lampshades"... I knew that somebody, somewhere, had already attempted this. And rather than ruining the shades, I figured it would be smart to do my research first! And after researching for probably half an hour, I found that it has and can be done! I decided on plain black. I did see a beautiful pair of black and white striped shades but I didn't think a striped pattern would work well with the shape of my shades. Or maybe I could imagine the stripes being crooked and not lining up by the time I made it around the backside.. same thing! Both good reasons to skip the stripes!
I started out thinking I would only spray the outside of the shade... ha ha. I brought it inside after painting two coats on the outside, turned the lamp on, and holy SPLOTCHES! It was horrendous! Back to the drawing board... I flipped the shades over and sprayed the inside with two coats as well. With fingers crossed, I turned the lamp on again and........... it was perfectly even! Good thing, because I didn't have a plan C in mind.
Here is lampshade with both sides painted, doesn't it look so much better? Just ignore that the table it is sitting on looks completely different. That is due to my inability to start and finish projects.
I feel so much more accomplished with my projects when I put the before and after pictures side by side, so here you are:
Let me know what you think!
Supplies Needed:
-Painter's tape
-Black spray paint
-Old cardboard or other surface to paint on
Total Cost:
$0
** We had everything we needed already, best kind of project! :)


No comments:
Post a Comment