
Unless, of course, I am too tired from my first official week of therapy this week! Those sweet little children can be exhausting! I'm so excited to see my returning students and to meet my new ones!
Ok- back to my project.
Supplies needed:
-4x4 post
-scrap wood
-scrap molding
-hook
-screws
-spray paint
-caulk
-finish nailer
Basically the steps were as follows:
1. Cut the post to the desired height.
2. Find some scrap wood to make a top and bottom piece.
3. Add molding around the edges with a finish nailer for a more finished look.
4. Screw hook into the post.
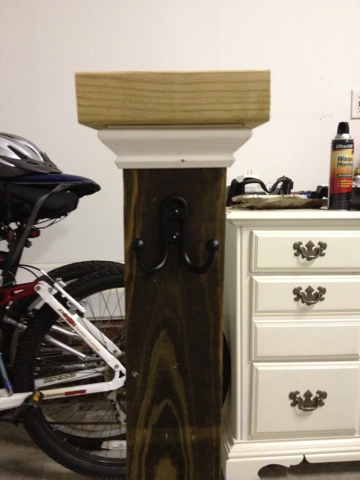


5. Caulk the molding. If you are great at cutting molding, maybe you can skip this step! But mine was very imperfect! It was late at night, I was outside by myself in Ian's shop... I sort of rushed through that part. And the whole time I was thinking, "Once I spray paint this, you won't be able to tell!"
6. Spray paint the whole piece.
6. Let dry!
7. Hang your sign!
I'm hoping to make a little sign for each season! But for now, I just made a generic "Welcome" sign! If you'd like to see how to make one of your own, click here!
Here it is one more time:

I'm pretty excited about it :)
2 comments:
Cute!!! The lettering on your sign looks so perfect!
Thanks Emily!! I wish I could say that I did it freehand, but that would be a lie! I just added another post about how I did the lettering! It is so easy- you should definitely try it! :)
Post a Comment