

This was probably the easiest DIY project I've done in a while! Here are the steps:
1. Stuff some tissue in the lightbulb sockets
2. Hang
3. Spray paint (I used black with a satin finish)
4. Let dry
5. Go buy lightbulbs while waiting for it to dry
6. Wire it up! (much easier than it sounds!)
7. Panic when you turn on the switch, prepared to enjoy the light in all its glory.... and only two of the bulbs come on!! Ahhhh! I had a freak out moment. I mean, there was really no way that I could have tested it before doing all that work unless I asked them to do it in the store... yeah, that probably would have been smart. Oh well. Crisis averted! I said a little prayer, crossed my fingers, and screwed the other bulbs in a little harder and to my surprise- they worked!!! All 6 sockets :)
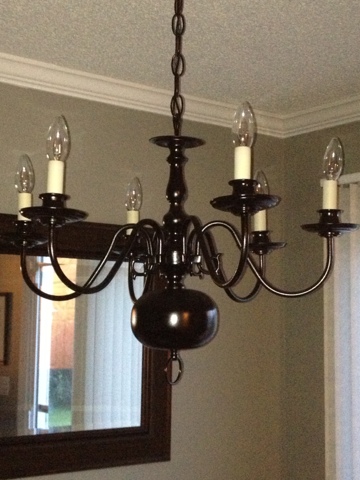


I think I am going to paint the white (well, off-white) candlesticks black before its all done. They are bothering me. If they were white-white, I wouldn't mind them. But the fact that they look like they are old white is bugging me. And when something is bugging me... it doesn't take long before I must fix it. That's a lie. Sometimes it does take long. But I still have every intention of doing it. And it will get done... eventually.
And if I ask Hubs if he thinks I should paint those dingy candlesticks black, he will probably say, "Why are you even asking me... you're going to do it!" Which is true... but I at least like to throw it out there just to see what he thinks ;)
My main goal was to find a chandelier that had lights which pointed up rather than down. Here is what we had before:

There is absolutely nothing wrong with it. But when I get something in my head, there's no stopping me!
**UPDATE: I painted the candlesticks. And I LOVE it so much more now!!!


To paint them, I screwed 6 screws into a piece of wood and placed a candlestick on each one. Then, I sprayed away!!
What do you think?
Have a great day!!
